Experiment #1: Where do balloons go when they fall on the ground?
Rubber latex balloons are degradable because they are a natural plant product. These balloons are made from a milky substance from the rubber tree and decompose by natural processes – exposure to soil bacteria, sunlight, moisture and atmospheric oxygen. Many of your students may be surprised to see just how this happens.
Getting Started:
Show the children a collection of natural plant products such as pieces of potato, lettuce, apple, banana, bread and candy. You also can show them things like paper, coffee grounds and tree leaves.
Have the children discuss how these things are different and they are alike. After a bit, you may want to steer them to the fact that all are natural products by asking, “Where did all these things come from?” Some may say “from the grocery store.” But the best answer is: They grew. 
Discuss what happens to apples, bananas or bread when they “sit around” for a long time. Apples rot. Bananas get soft and turn dark. Bread gets hard and moldy. What about tree leaves? They turn color, fall and gradually decompose. If you can find a leaf skeleton, show it to the class as an example of natural decomposition. Show the class some latex balloons. Ask whether anyone know what they are made from. Many may say, “plastic.” You can tell them the balloons are natural products, similar to candy. Balloons are made from rubber tree juice. Candy is made from the juice of the sugar cane. Here you can describe how rubber trees are tapped to get the latex.
Now that the class understands that balloons decompose like other natural products, you can ask the students to come up with their own methods of investigation. They should make suggestions for creating experiments to see how balloons decompose. Among the questions they should consider are: location of balloons, effect of moisture, light and temperature on the balloons and length of time it might take for the balloons to break down.
Since most of the students already have been exposed to grow lights, soil and plants from previous lessons, they should reach that conclusion on their own. If not, you can lead them in that direction.
Collecting Data:
To demonstrate biodegradability, you will need:
- A plant light. A 150-watt GE “gro & sho” light.
- A shallow pan, aluminum pie plate, or Petri dish.
- Garden soil and peat moss, two centimeters deep.
- About 20 grams of composting agents.
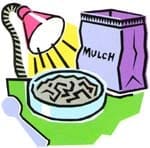 Mix the compost with the garden soil/peat moss. Wet the mixture well. Blow up and cut into pieces several balloons before burying in the mixture.
Place the plant light about 20 centimeters (about 8 inches) above the pan. Add water to the pan daily to keep the soil mixture moist.
Explain to the children that bacteria lives in the soil, and that it eats away at the balloon molecules. Ultraviolet light from the sun (represented by the grow light) and oxygen also combine to break down the balloon. The physical appearance of the balloon changes as it decomposes.
Examine the balloons in the pan periodically. After about 20 hours under the light they should begin to show considerable degradation. After 60-70 hours, the balloons should be largely disintegrated. The children can compare the deteriorating balloons to those left in the package in which they came.
Charting Results:
The children may be interested in putting other natural substances in the soil, along with the balloons such as dry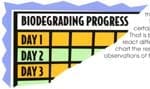 leaves, wood shavings, or grass-to compare the decomposition rates. They also may want to watch balloons break down under other conditions such as natural sunlight, and compare the different rates of decomposition. The children might notice that balloons of certain colors biodegrade faster than others. That is because the chemicals in different dyes react differently to the bacteria. Suggest that they chart the results and write a report on their observations of the decomposition process.