Balloon Fashion Design
Just Marie
Balloon fashions have become the latest rage in our industry. Balloon dresses are not new, but have recently gained world wide notoriety following a fashion show that took place in Shanghai, China. Designers from all over the world have ideas and concepts for creating their own styles of dresses, costumes and fashions. The following is my perception. 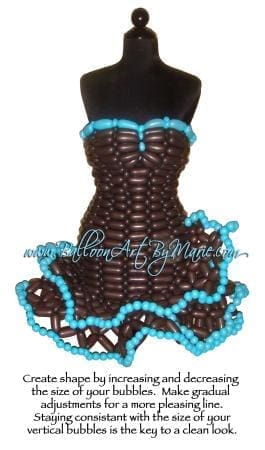
Concept/Style Decision
By determining the type of event, you can choose the style of dress your client will require. For inspiration, see what traditional fashion designers are doing for the current season. Don’t be limited there, though! Check with costume designers and historical fashions as well. Don’t be afraid to combine styles. Be bold and daring. Ask a LOT of questions – anyone daring enough to wear latex fashion is probably going to be willing to take a chance! 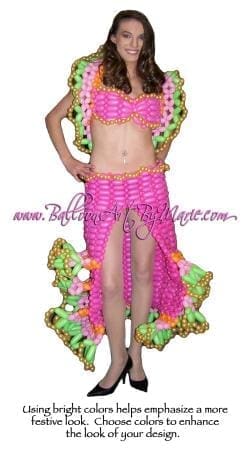
Color Choice
Many factors can be taken into consideration when making this choice. Most important is the model’s skin and hair coloring. Learn how to determine what colors work well with different tones. The internet can also be quite helpful when checking what the fashion industry is doing. Also, make sure the colors you choose are compatible together. Color wheels are available at craft and home improvement centers.
Keep your theme and/or event in mind. You don’t want to overwhelm your client by choosing colors that are bright and vibrant for an elegant affair. However, for a more costume or party-like look, these colors are a perfect choice.
Body Shape
Remember to conform the dress to the shape of the model. Smaller bubbles at the waist will help contour the shape. Adding partial rows of balloons will help add “curve” where needed or desired. 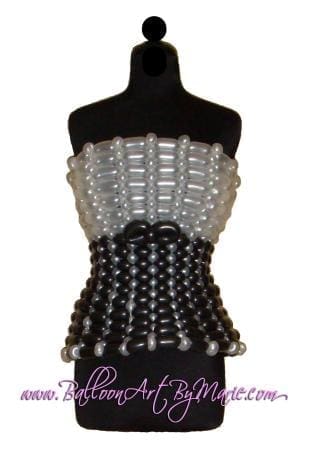
Dress/Skirt Shape
A straight skirt is the easiest to achieve because all the bubbles are a consistent size. Creating a bell shaped or A-line skirt can be a little more difficult. Be careful not to increase the dimensions too drastically. If your horizontal bubbles become too large, consider dividing the segments by adding more vertical balloons. This can also add an interesting pattern to your design. 
Creating Design
Study different weave patterns to create different looks in the fashion. By simply changing the weave pattern, several different looks can be achieved. Use the weave to your advantage. Alternating colors to create stripes, plaids and checks adds an extra dimension to your design. 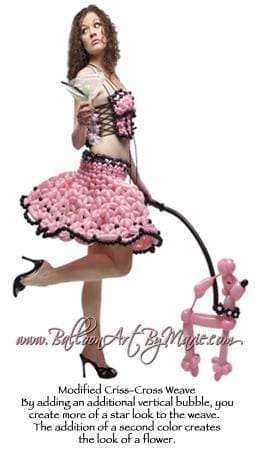
Balloon Choice
Using metallics and pearls will make the construction easier. Although they are sometimes more difficult to work with, when trying to create tiny bubbles (as in the vertical bubbles) they hold the shape much better than “regular” balloons. They also give a much more elegant look to many fashions. You are limited on color choice when using them.
Actual Construction
For the basic dress, f you know how to make a David Grist Birthday Cake, you’re off to a great start. It’s pretty much the same concept… Only on a MUCH grander scale.
It is easiest to construct the dress on a mannequin. This allows you to conform the dress to an actual shape. Measure your model just under the arms and divide that number by (hand width “) rounding up. This is the number of segments you’ll use for the body of the dress. Chalk drawn lines on the mannequin will give you reference points if needed.
Remember that the dress has to come OFF the mannequin and onto a person! You have to create a way to “open” the dress. Here is the simplest way I’ve found so far:
Starting each row in the back just under the arms, begin with a small pinch twist. This pinch twist becomes a button, per se’. When completing that row, the last horizontal bubble is tied off with a long tail and wrapped ONLY ONCE around the pinch twist. This technique has to be done until you reach just above the hips – the widest point of the body. After that point, you can simply use a “double bubble” to continue down and around. Once the dress is complete, simply undo the “buttons” and remove it from the mannequin. There is still a bit of shimmying required, but only because you can’t really tug at the dress. Redo the buttons, cut off the excess and voila’.
Keep in mind that any embellishments, i.e., pearls, lace, etc. that are attached to the torso must be made to open in the back at the “buttons” as well.  *If the mannequin you have is much smaller than your actual model, add layers of batting until you achieve your desired dimensions. Cover the batting with muslin for a smooth surface.
Time Savers / Quick Tips
Working with larger balloons (260s) doesn’t create as detailed of a look, but allows the dress to be created in a much shorter time (only recommended for skirt portion).
Create components that can be worked on by multiple twisters at the same time and combined when completed.
Use your hands and fingers as your rulers (unless you’ve got nothing but time, then a ruler works alright, too).
Beauty in the Details
Embellish! Embellish! Embellish!
Fantasy Flowers in the hair add a spectacular touch to any ensemble (and can be re-used!).
Hats of any size that are color coordinated to the outfit can add another dimension.
…a simple purse, corresponding jewelry… forget nothing!
Let your imagination be your guide.
The only way to truly perfect any design is to practice. I, for one, am still working on it!
Just Marie
L’Artiste de Ballon
www.BalloonArtByMarie.com