
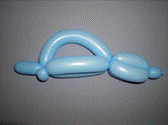
Dolphin
Patricia Bunnell
 |
 |
 |
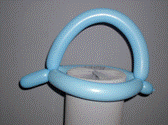
| Step 1
Make a helmet hat base but have the bubble on the tip end about 3 inches. This is the dolphin’s nose. |
Step 2
Pinch off a 1 inch bubble on the arch near the dolphin’s nose. |
Step 3
Make a pinch twist out of the 1 inch bubble and center it under the nose. |
 |
 |
 |
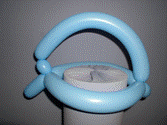
| Step 4
At the back of the hat base wrap your hand around all three bubbles and make them into about 5 inch bubbles. |
Step 5
Carefully twist the three 5 inch bubbles. |
Step 6
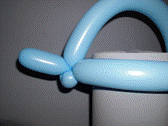
Inflate a 160 leaving about a 3 inch tip and attach it to the front of the dolphin. |
 |
 |
 |
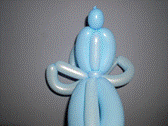
| Step 7
Make a bubble with the 160 the same length as the body of the dolphin. |
Step 8
To make its side fins make an 8 inch bubble followed by two 3 inch bubbles and finish with another 8 inch bubble. |
Step 9
Twist the bubbles to form fins. |
 |
 |
 |
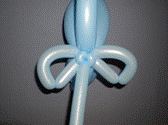
| Step 10
Add two pinch twists on the top of the dolphin, and between the two side fins. |
Step 11
Make a dorsal fin between the 2 pinch twists. |
Step 12
Add a pinch twist under the dolphin on his belly. Make a bubble the same size with the left over 160. |
 |
 |
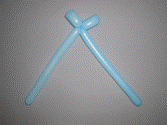 |
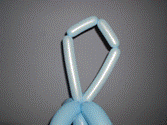
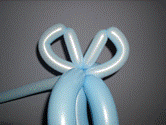
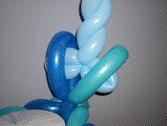
| Step 13
Fully inflate a 260 and burp to soften (very soft). Make two equal bubbles. |
Step 14
Make 2 bubbles about 6 inches or so. |
Step 15
Twist the bubbles to form loops. It should look like a bow. |
 |
 |
 |
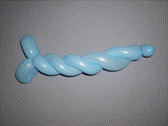
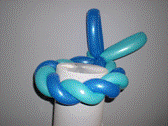
| Step 16
Spiral the two bubbles and twist off two 1 inch bubbles at the ends. |
Step 17
Twist the spiral in at the base of the dolphin’s body. Pinch twist the bubbles with knots on them. Place one underneath the dolphin’s belly. |
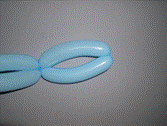
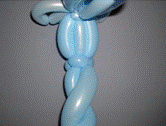
Step 18
Fully inflate two 260s and spiral them together leaving 9 inches or so on the ends. Make two 1 inch bubbles and twist together. |
 |
 |
|
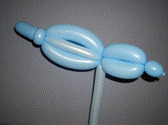
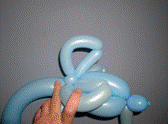
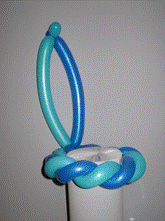
| Step 19
Pinch the 2 bubbles to form loops. |
Step 20
Insert the flippers of the dolphin into the loops. |
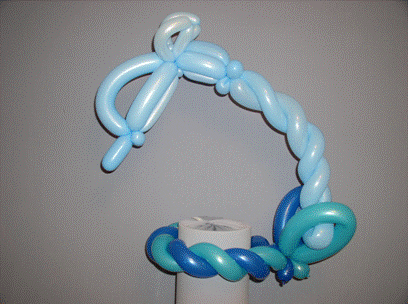
You don’t have to make a hat for this dolphin; he is cute enough without it. But the WOW effect is worth it!