Walrus Hat
by Ralph Dewey
The Balloon HQ challenge this month is a walrus or walrus hat.
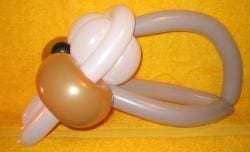
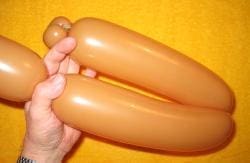
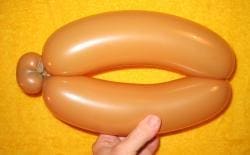
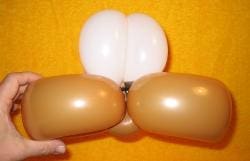
The Walrus hat is fairly easy to make. You’ll need a mocha brown #350 balloon, two black round balloons, two white #321 balloons, one gray #260 balloons and one white #260 balloon. Begin by inflating the mocha brown #350 to about 25 inches and tie off the nozzle. Twist off a 1-1/2″ bubble and ear twist it. Then twist off two soft 11″ bubbles (the cheeks). Connect them by twisting their ends together. Deflate the excess balloon and tie it off. But be sure to leave about 2 inches for tying purposes later. Fold both 11″ bubbles and twist them together. Place the 1-1/2″ ear twist (the lower lip) as shown in the photos.
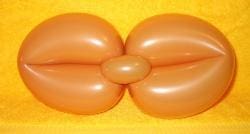
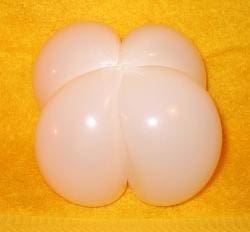
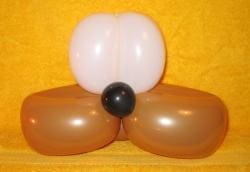
Use the two white #321 balloons to make the eyes. Inflate them both to about 90% capacity and tie off their nozzles. Divide both of them in half and twist-connect them together. Then tie the ends together to form a four-bubble eye cluster. Use the 2 inches of the mocha brown balloon to tie the eye cluster to the cheeks.
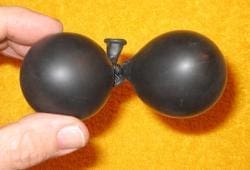
Inflate the two black 5″ round balloons to only about 1-1/2″ each and tie their nozzle together. One bubble will be the nose and the other bubble will be used to attach the headband to the walrus when it is constructed later. Place the black balloons under the eye cluster so that one is in front and one is in the rear.
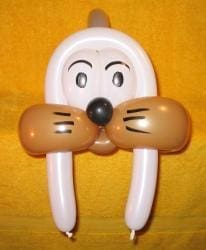
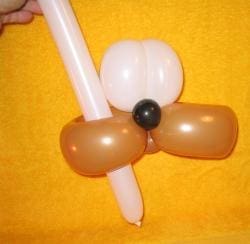
To complete the head and tusks, inflate a white #260 to about 26 inches or so and tie off the nozzle. Insert the nozzle end through one of the cheeks so that it protrudes about 5 inches under the walrus. Insert the other end of the white #260 through the other cheek. Make that tusk also 5 inches. Tie and trim off the excess balloon.

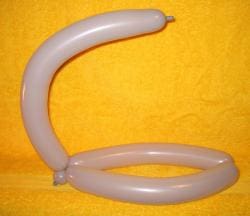
Make the headband by inflating the gray #260 balloon fully except for about 1 inch and tying off the nozzle. Twist off a 1/2″ bubble and two 14″ bubbles (This varies depending upon the head size of the recipient). Twist-connect them together. This is the headband and very similar to the standard Indian hat.
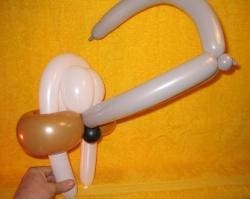
Wrap the black round balloon (The one at the rear of the walrus) to the twist between the two 14″ bubbles. Tie the nipple end to the top of the eye cluster. Mark the face of the walrus with a black Sanford Sharpie or Expo to complete it.